
I love gingerbread. Anytime. Anywhere.
If you’re anything like me, baking a little batch of gingerbread cookies or whipping up a gingerbread cake isn’t something that’s reserved for the festive season – it happens all year round. So even though Christmas has come and gone, I thought I’d share this recipe with you all to keep those holiday vibes going.
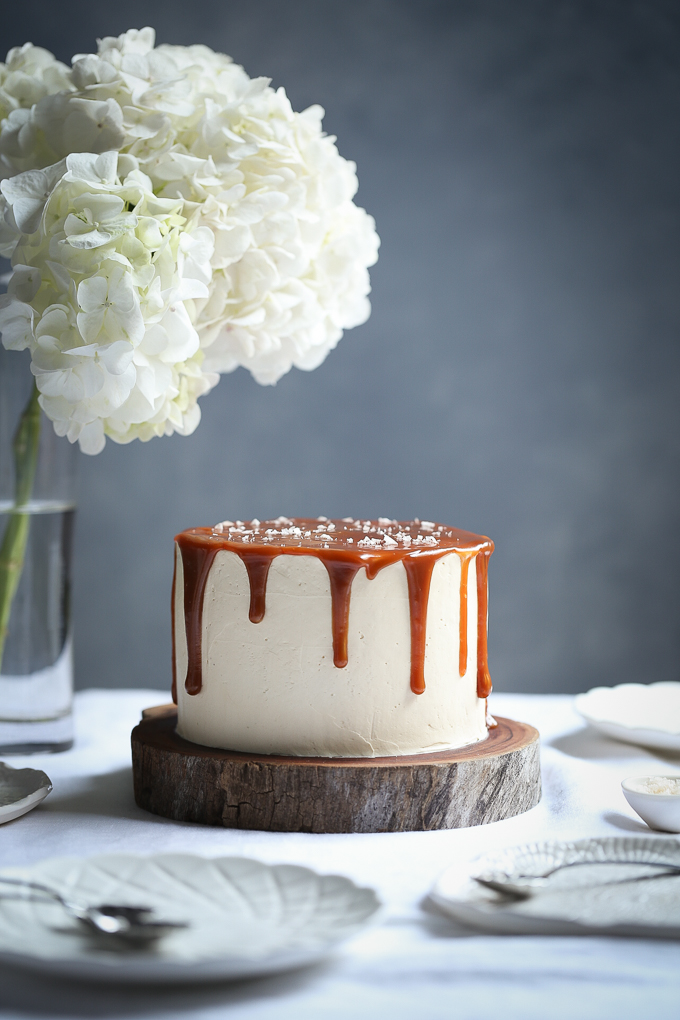
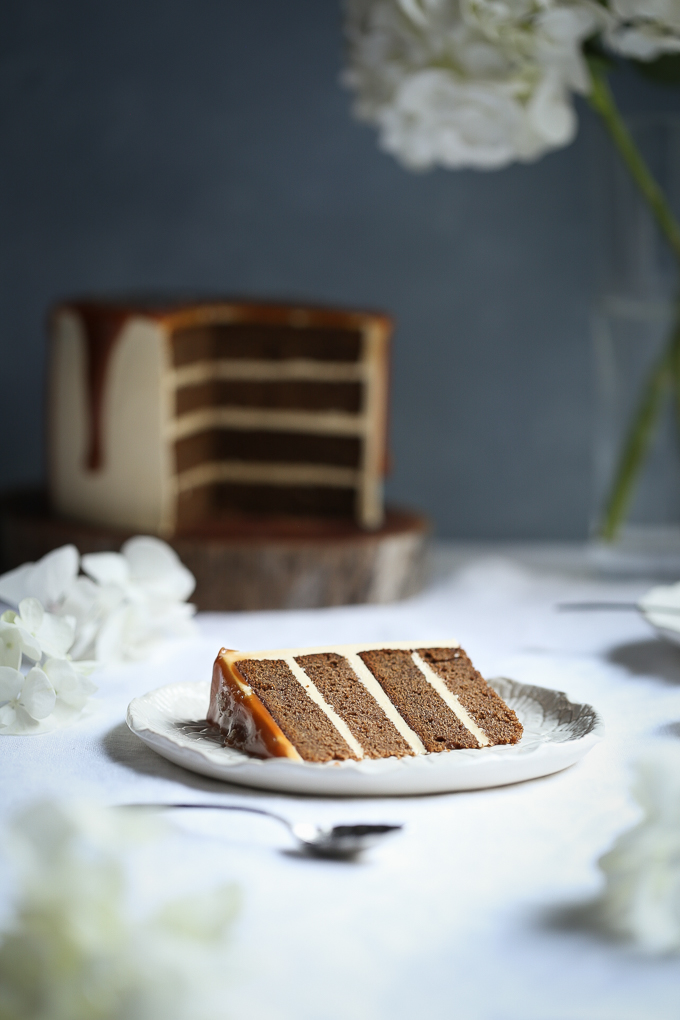
I paired this one with the most delectable salted caramel sauce so you’ll have yourself a delightful gingerbread layer cake perfect for any occasion.
Baking Notes
- If this is your first time making a layer cake or you encounter any problems while making it, I would highly recommend you refer to my post on Layer Cake Basics.
- If this is your first time making swiss meringue buttercream or you encounter any problems while making it, I would highly recommend you refer to my post on Swiss Meringue Buttercream Basics.
- Please take great care not to burn yourself when making the salted caramel, especially when adding the cream to the sugar, as it will bubble up and can cause injury if it overflows over the side. Use oven mitts and a long sleeve shirt. Also don’t touch the caramel when it is still hot as this can easily burn. For best results, avoid using a non-stick saucepan, and ensure it is large enough to prevent overflow. Be mindful that the caramel will continue to thicken the longer it’s cooked, and also will thicken when it cools. If it is too fluid after cooling, you can reheat it on the stove for another 2-5 minutes to thicken it further.
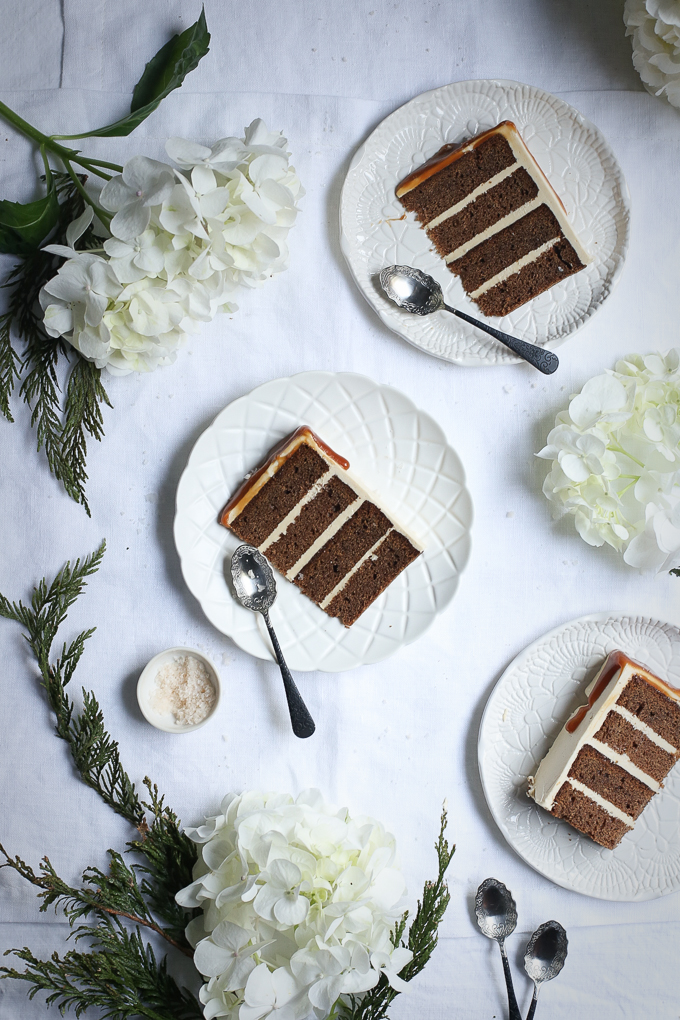
Gingerbread Cake with Salted Caramel
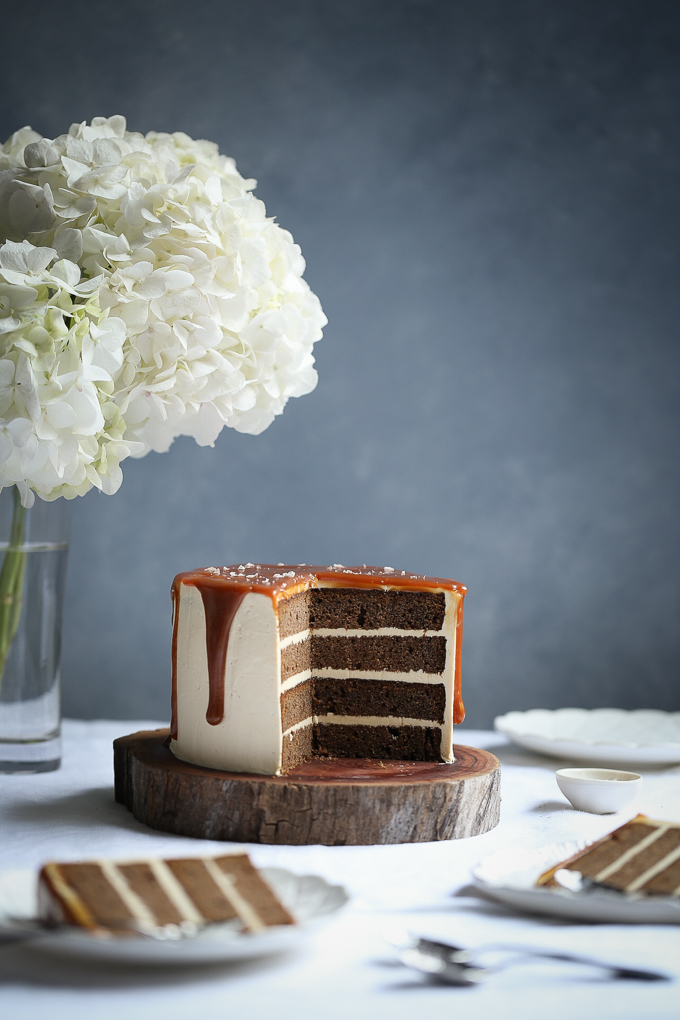
Makes a four layer 15cm (6”) cake and serves 8-12 people
Ingredients
Gingerbread Cake
- 170g unsalted butter
- ½ cup pure cream
- 200ml whole milk
- 2 large eggs, at room temperature
- 140g (2/3 cup, firmly packed) light muscavado sugar (or light brown sugar)
- 125ml (½ cup) golden syrup
- 3–4cm piece fresh ginger, peeled, grated finely
- 370g (2 ½ cups) plain flour, sifted
- 1 ½ tsp baking soda, sifted
- 2 tsp ginger
- 2 tsp cinnamon
- 1 ½ tsp cloves
- 1 tsp cardamom
- Pinch of salt
Salted Caramel Sauce
- 250ml pure cream
- 250g caster sugar
- 50g unsalted butter, coarsely chopped, at room temperature
- 1–2 tsp good quality sea salt flakes (or to taste), plus extra for sprinkling
Salted Caramel Swiss Meringue Buttercream
- 6 large egg whites
- 270g caster sugar
- 375g unsalted butter, coarsely chopped, at room temperature
- 5–6 tbsp Salted Caramel Sauce (or to taste)
Instructions
Gingerbread Cake
- Preheat oven to 180°C (160°C fan-forced) and grease or line two 15cm (6”) cake tins with greaseproof paper.
- Melt butter in a small saucepan, add milk and cream and stir over low heat until smooth. Do not allow to boil. Set aside.
- Place eggs and sugar in free-standing mixer with paddle attachment and beat on medium speed until pale (approximately 3-5 mins).
- Add golden syrup to eggs and sugar, then grated ginger, and continue to mix until smooth.
- Sift flour, baking soda, spices and salt together in a large bowl.
- Add 1/3 of the flour mixture to eggs and sugar mixture, and mix on low speed until smooth, then add 1/3 of the butter mixture. Continue to alternate between adding the dry and wet ingredients into the batter and mix on low speed until smooth. Scrape the bowl with a spatula between each addition and take care not to overbeat.
- Divide batter evenly between cake tins, weighing the tins using a kitchen scale to ensure equal volume.
- Bake in pre-heated oven for approximately 40-45 minutes, or until a cake tester comes out clean.
Salted Caramel Sauce
- Heat cream in a small saucepan over low-medium heat until hot and steamy, then remove from heat while caramelising sugar as below.
- Melt 1/3 of the caster sugar in a medium saucepan over low-medium heat.
- Continue adding the sugar over the melted sugar in small additions, until all the sugar has melted and you have achieved a dark, amber colour.
- Remove the pan of melted sugar from the heat and quickly stir in butter and cream, mixing thoroughly and taking great care not to burn yourself.
- Return the pan to the heat and keep mixing until the sugar, cream and butter are mixed through.
- Add salt to taste, then leave to cool to room temperature. Transfer to an airtight container or sterilised jar until use.
Salted Caramel Swiss Meringue Buttercream
- Place egg whites and caster sugar in heatproof bowl over small saucepan of simmering water, ensuring the base of the bowl does not touch the water.
- Allow the sugar to dissolve, whisking intermittently, heating to 65°C to ensure egg whites are pasteurised.
- Allow mixture to cool to room temperature, then whisk in free-standing mixer until white, glossy, soft meringue peaks form.
- Very slowly add small 1cm cubes of softened butter, then salted caramel sauce to taste, and continue whisking until buttercream is light and fluffy.
Assembly
- Assembling this cake is easiest when the cake is slightly chilled and the buttercream and caramel are at room temperature.
- Level each cake by slicing off the cake domes, then cut them in half lengthways to yield four cake layers in total. Use the base of one layer for the base of the cake, and the base of the other layer (turned upside down) for the top of the cake to avoid crumbs in the buttercream.
- Place the first layer on a round cake plate or turn-table and spread a thin layer of buttercream on the top, smoothing with a palate knife. Repeat frosting with each layer, then cover the sides and top of the cake with buttercream, smoothing with a palette knife.
- Place the cake in the fridge for about 15-20 mins at this stage to chill slightly, allowing this first thin layer of buttercream to form your ‘crumb coat’, locking in crumbs and preventing them from entering your final coat.
- Remove the cake from the fridge and using a palate knife, spread another layer of buttercream over the whole cake. Repeat this process of chilling and frosting if required to create a smooth crumb-free finish.
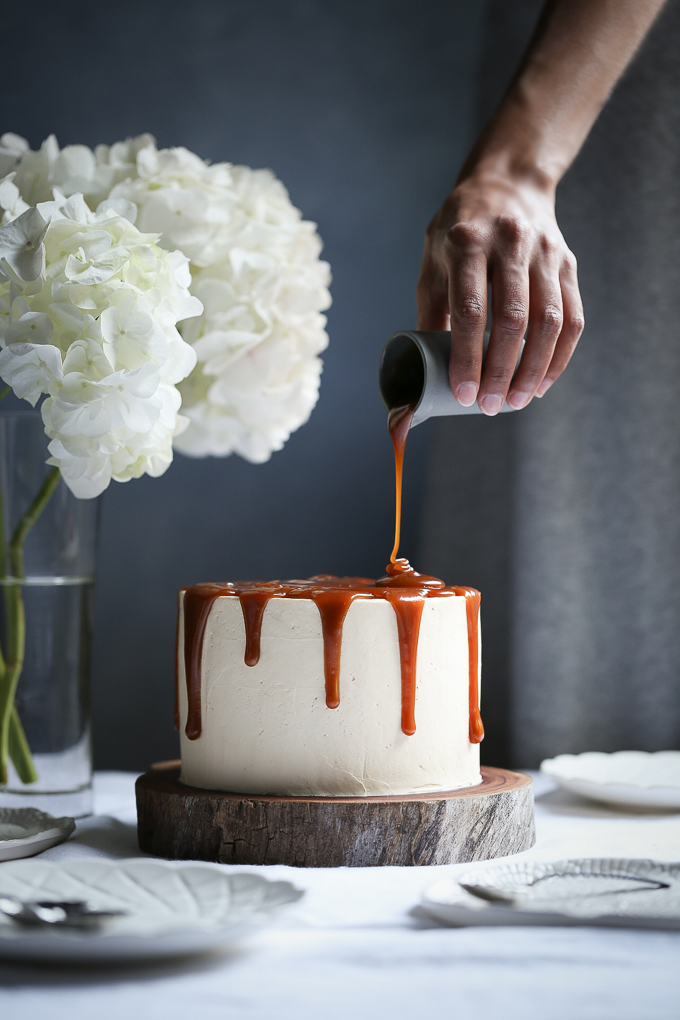
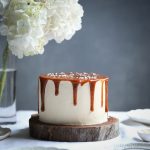
- Drizzle salted caramel sauce slowly over the top of the cake, allowing a little to drip down over the sides. You may have up to ¼ cup extra salted caramel left over, so be mindful of this when pouring to ensure perfect drips.
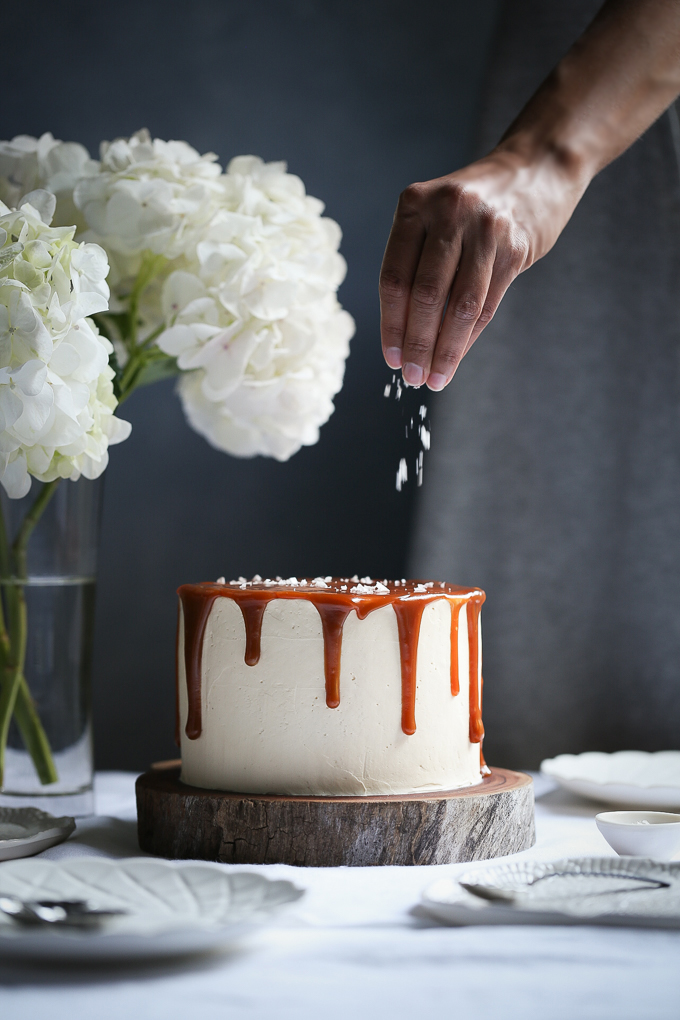
- Sprinkle sea salt flakes over cake when ready to serve. Serve at room temperature with a clean sharp hot knife.
Notes
- If this is your first time making a layer cake or you encounter any problems while making it, I would highly recommend you refer to my post on Layer Cake Basics.
- If this is your first time making swiss meringue buttercream or you encounter any problems while making it, I would highly recommend you refer to my post on Swiss Meringue Buttercream Basics.
- For the salted caramel – please take great care not to burn yourself when making caramel, especially when adding the cream to the sugar, as it will bubble up and can cause injury if it overflows over the side. Use oven mitts and a long sleeve shirt. Also don’t touch the caramel when it is still hot as this can easily burn. For best results, avoid using a non-stick saucepan, and ensure it is large enough to prevent overflow. Be mindful that the caramel will continue to thicken the longer it’s cooked, and also will thicken when it cools. If it is too fluid after cooling, you can reheat it on the stove for another 2-5 minutes to thicken it further.
Credits and Sources
Gingerbread cake recipe adapted from Linda Lomelino’s Gingerbread Bundt Cake
White ceramic vintage lace plates from Kim Wallace Ceramics
Napery from Red House VT
Hi Salma, this recipe looks amazing. Thanks for putting everything in grams – makes it much easier and also I can be sure that it’s a good thoughtful recipe. One thing, can you make ahead and freeze the salted caramel sauce please?
Hi Carly,
I’m delighted to hear you like this recipe – it is one of my favourites! Also glad to hear you prefer baking in grams – I agree, I find it a lot easier and much more accurate. The salted caramel can definitely be made in advance – I would usually recommend keeping it in a sterilised jar in the fridge. General food safety recommendations would be to consume the sauce by the use-by date of the cream in the recipe, but I have personally found as long as the jar is well sterilised and kept in the fridge – the salted caramel often keeps perfectly for a few months. Hope this helps and happy baking!
Kind regards,
Salma
Hi Salma, what’s the best way to loosen up the caramel sauce?
Hi Naomi,
Thanks for your query. I usually warm it gently in the microwave or on the stove to bring it to an easy pouring consistency before drizzling over a cake. Ensure it isn’t too warm though as you will risk it melting the frosting.
Hope that helps and happy baking!
Kind regards,
Salma