
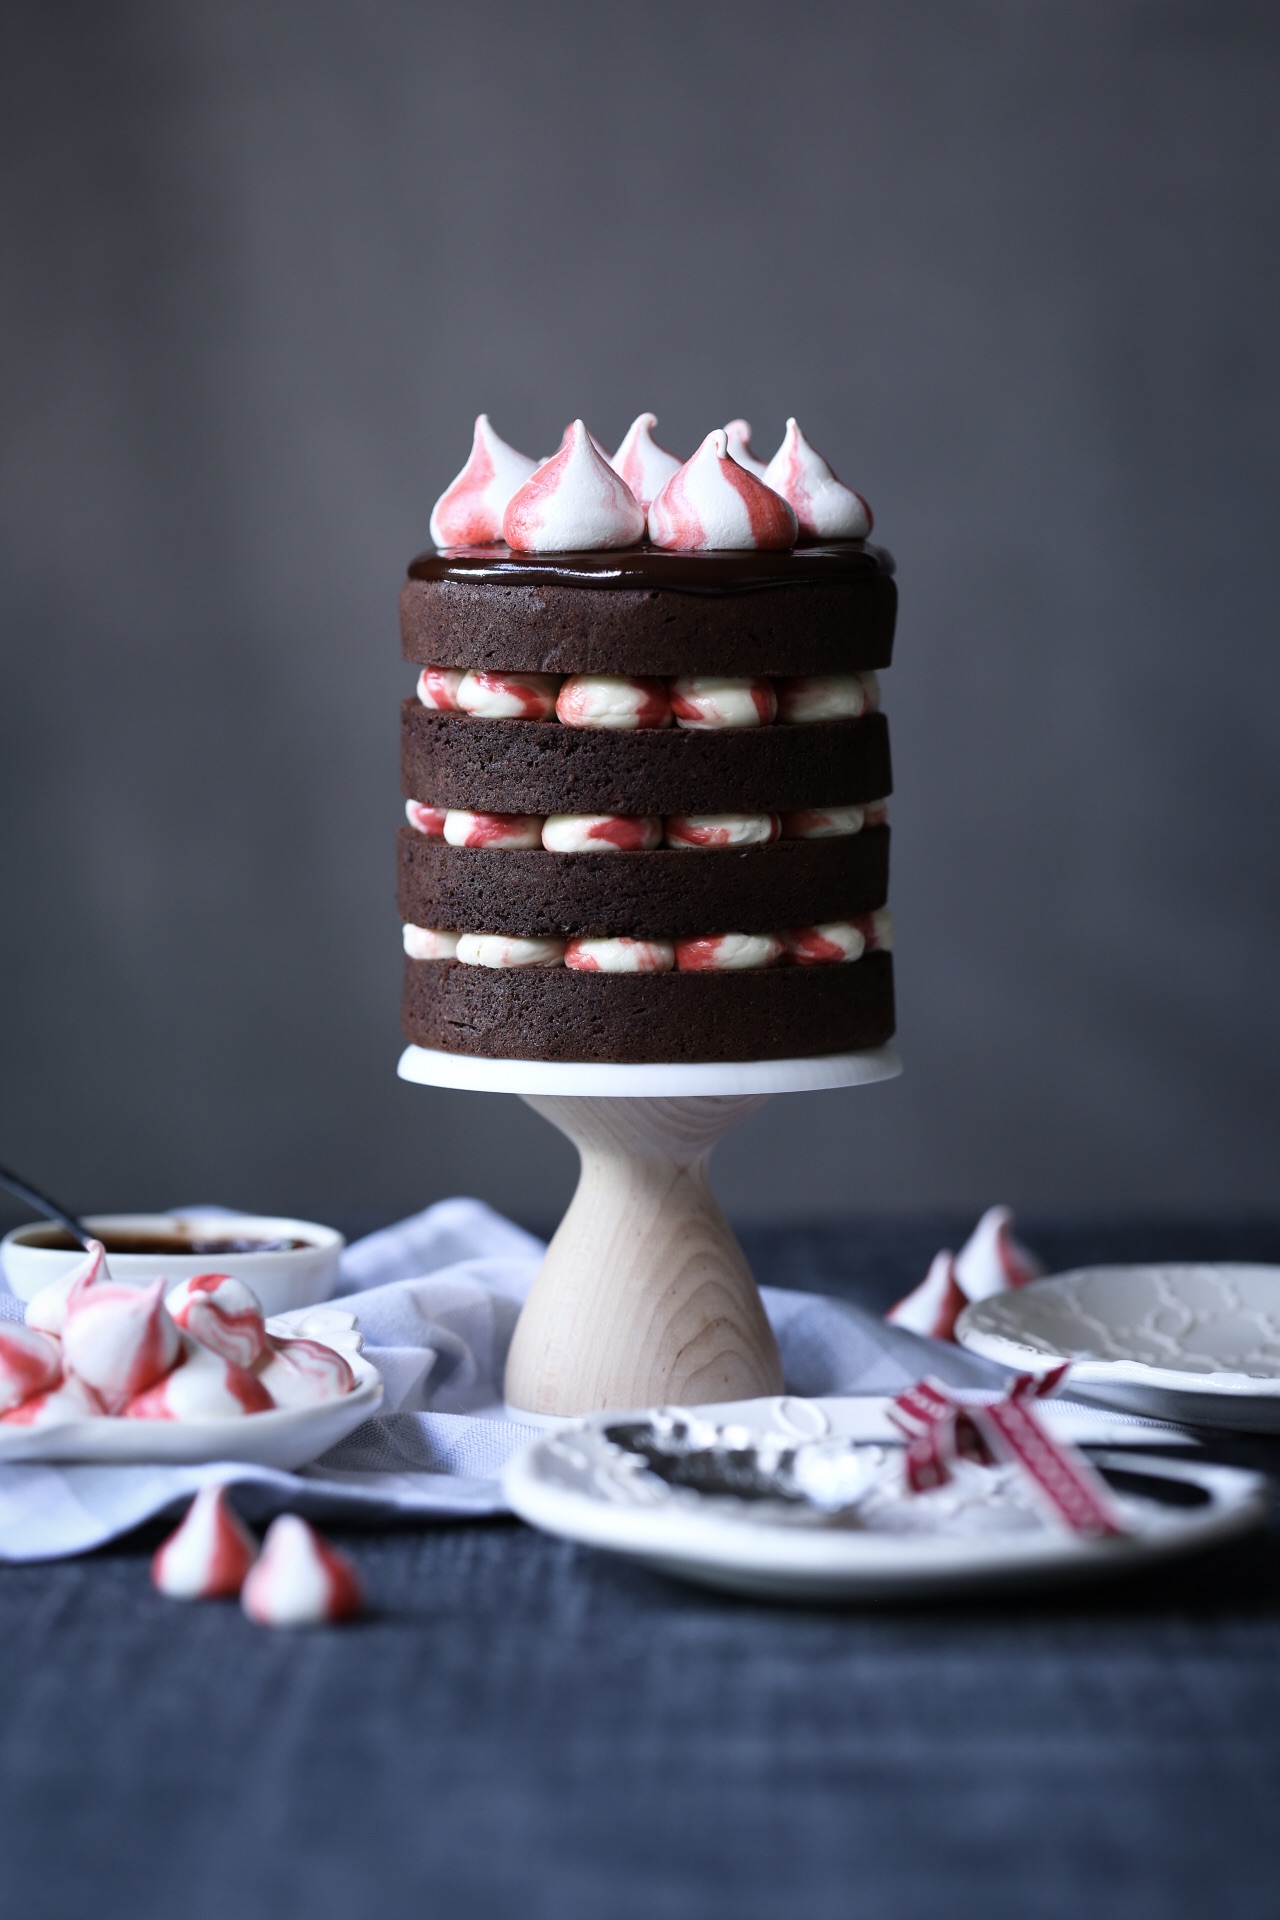
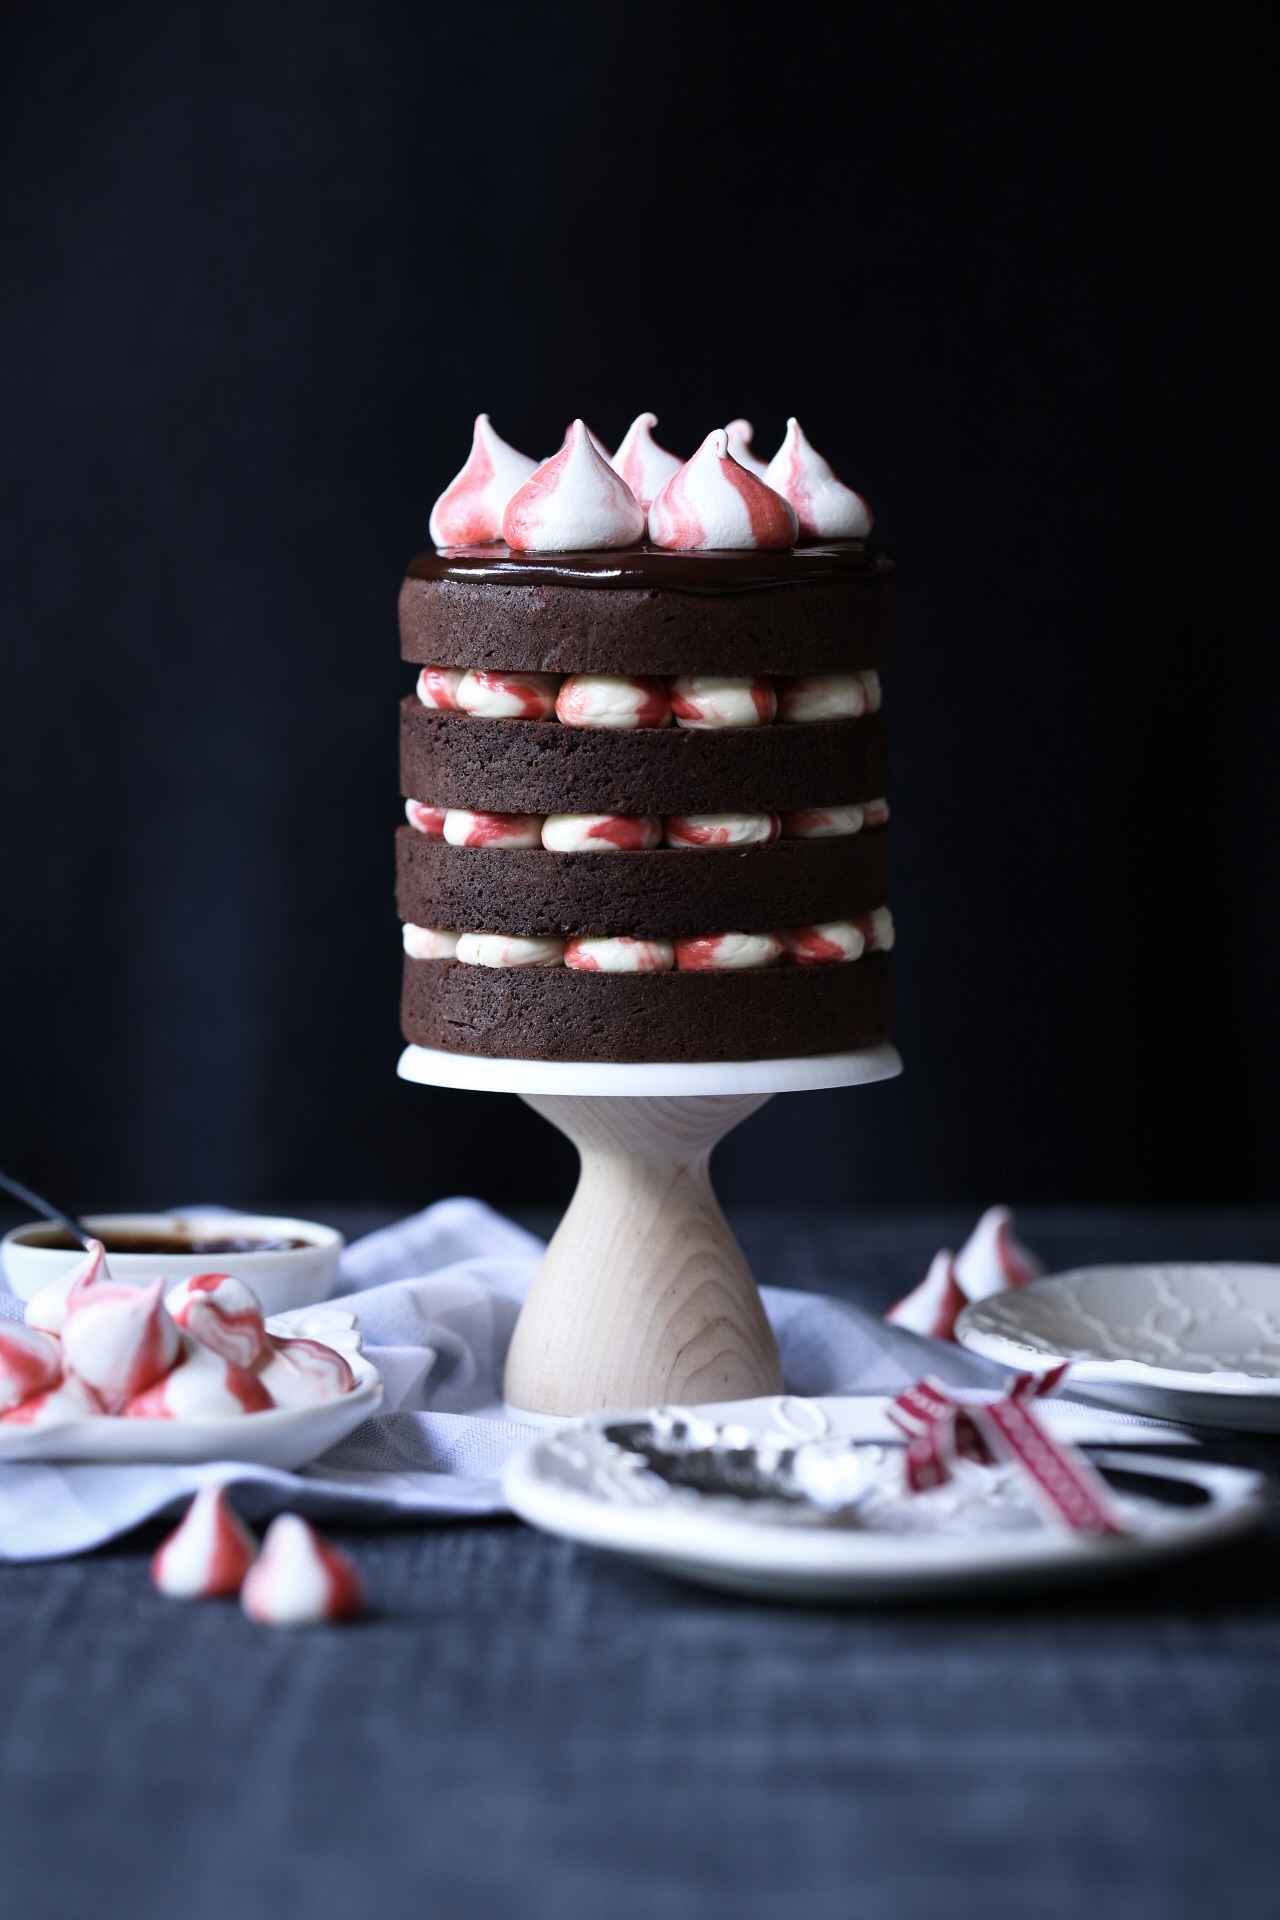
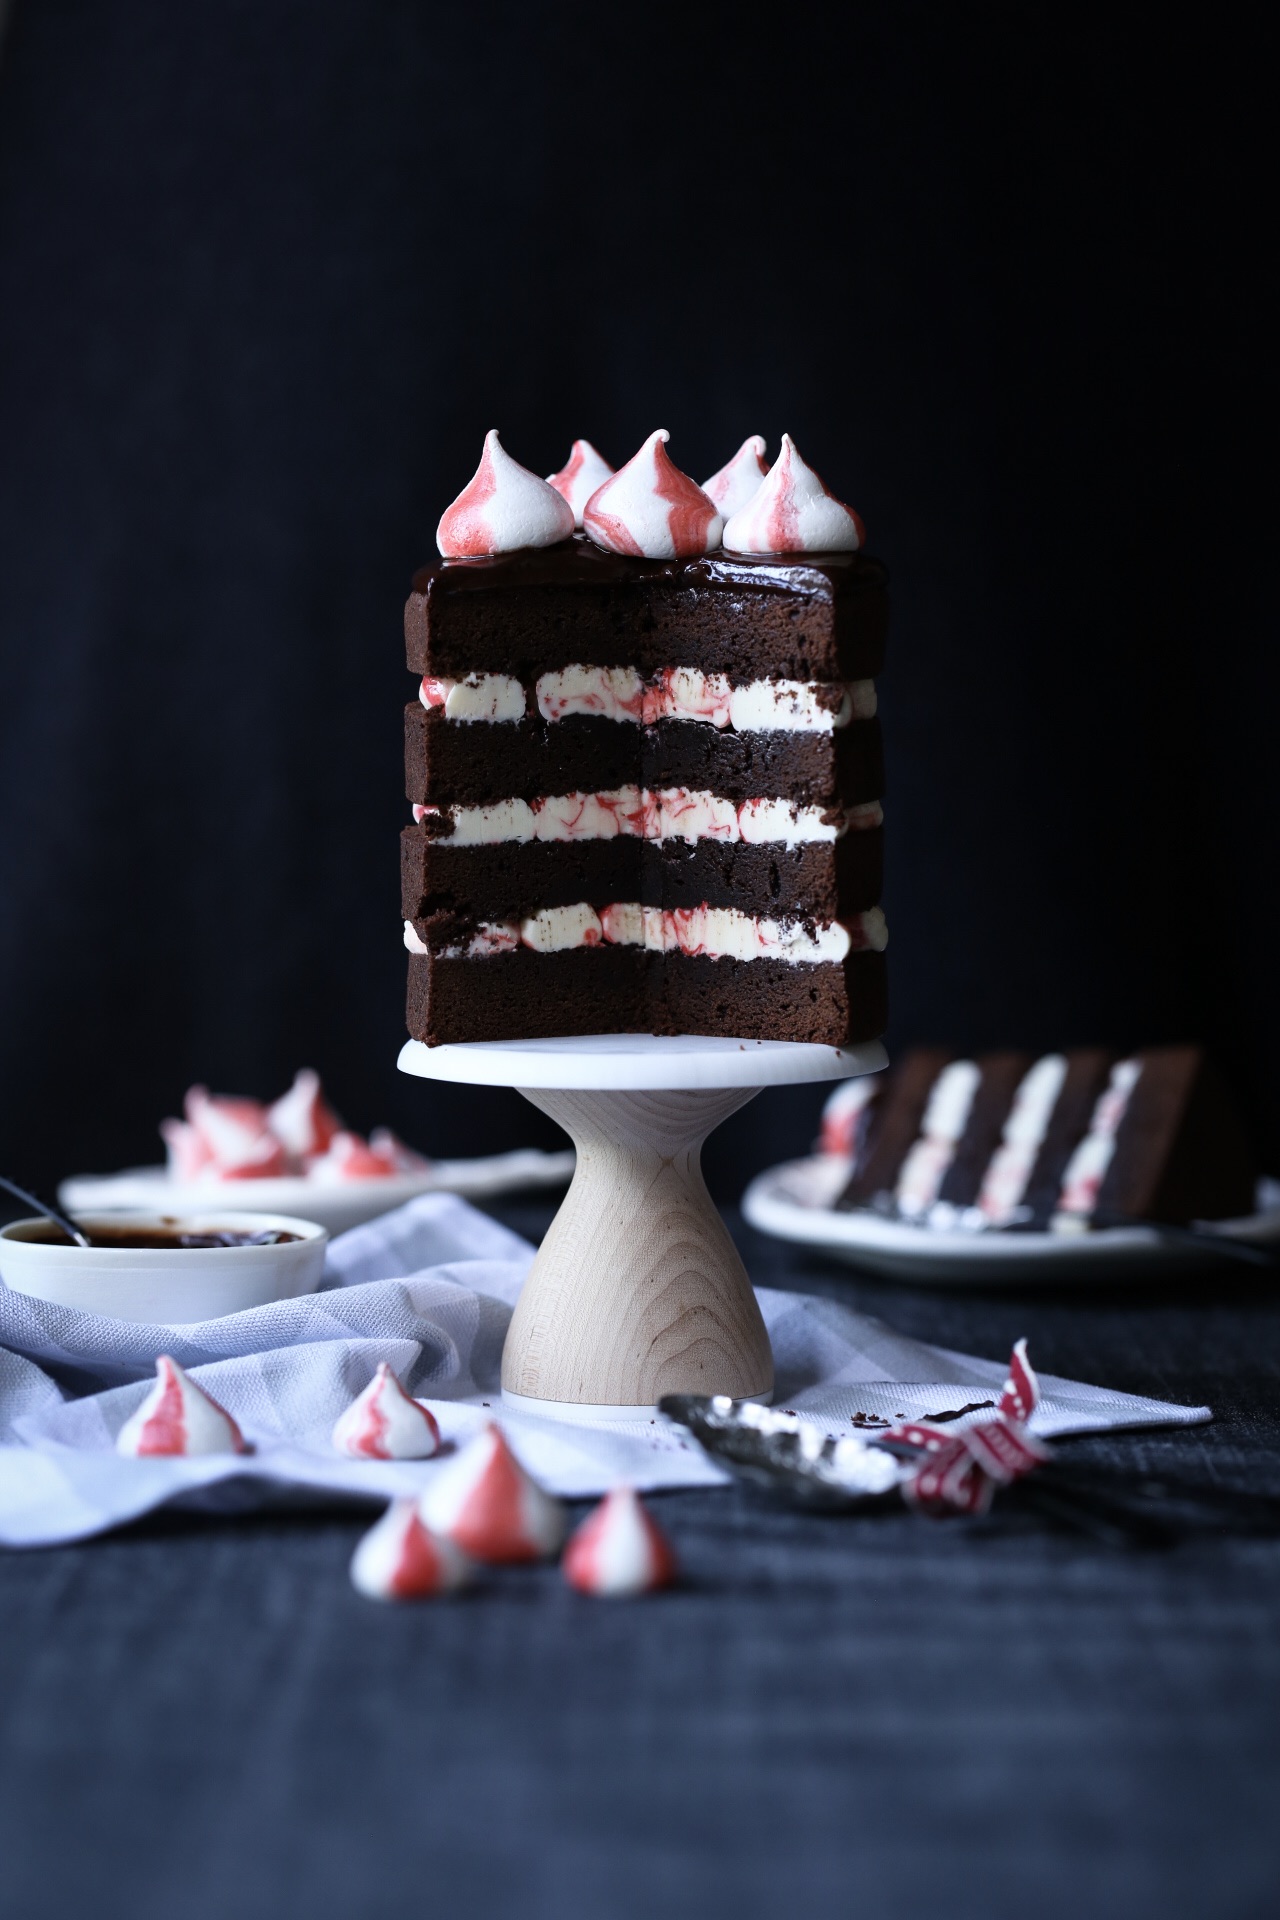
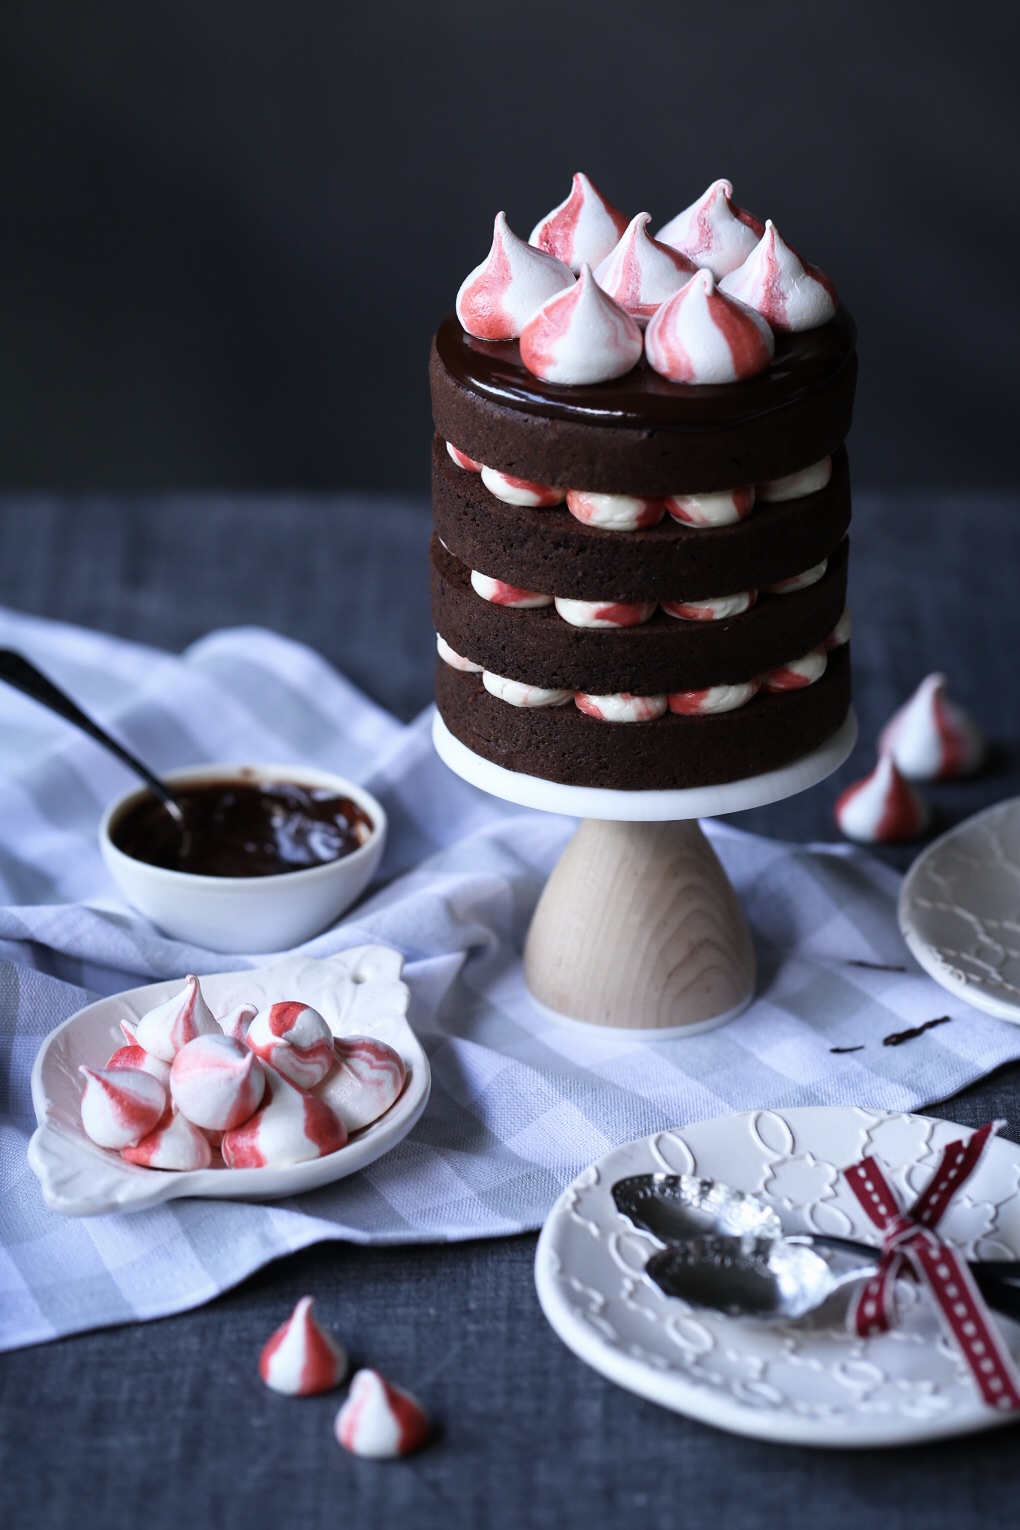
 This festive little number is THE cake for the holiday season. Moist dark chocolate brownie layers with refreshing peppermint swiss meringue buttercream make this cake a delightful palate cleanser and the perfect way to end an indulgent feast. Of course, you don’t have to reserve it only for special occasions. I’m sure your loved ones would be thrilled to devour this naked treat all year round!
 Baking Notes
(1) If this is your first time making a Layer Cake or you encounter any problems while making it, I would highly recommend you refer to my post on Layer Cake Basics.
(2) If this is your first time making Swiss Meringue Buttercream or you encounter any problems while making it, I would highly recommend you refer to my post on Swiss Meringue Buttercream Basics.
(3) This cake is actually a teeny tiny 4” cake – the perfect size as a treat for two or alternatively would make a beautiful gift. If you would like to treat more people (8-12), I would suggest doubling the entire recipe (cake, frosting and ganache) and bake the cake in two 6’ pans. Note that you will also need to bake the cakes for longer (approx. 45-50 mins).
(4) To achieve the red swirled effect of the peppermint swiss meringue buttercream, I tinted a small portion of buttercream red, and streaked it inside the piping bag. I would recommend paying close attention to this part of the method, as it will contribute towards the aesthetics of this cake.
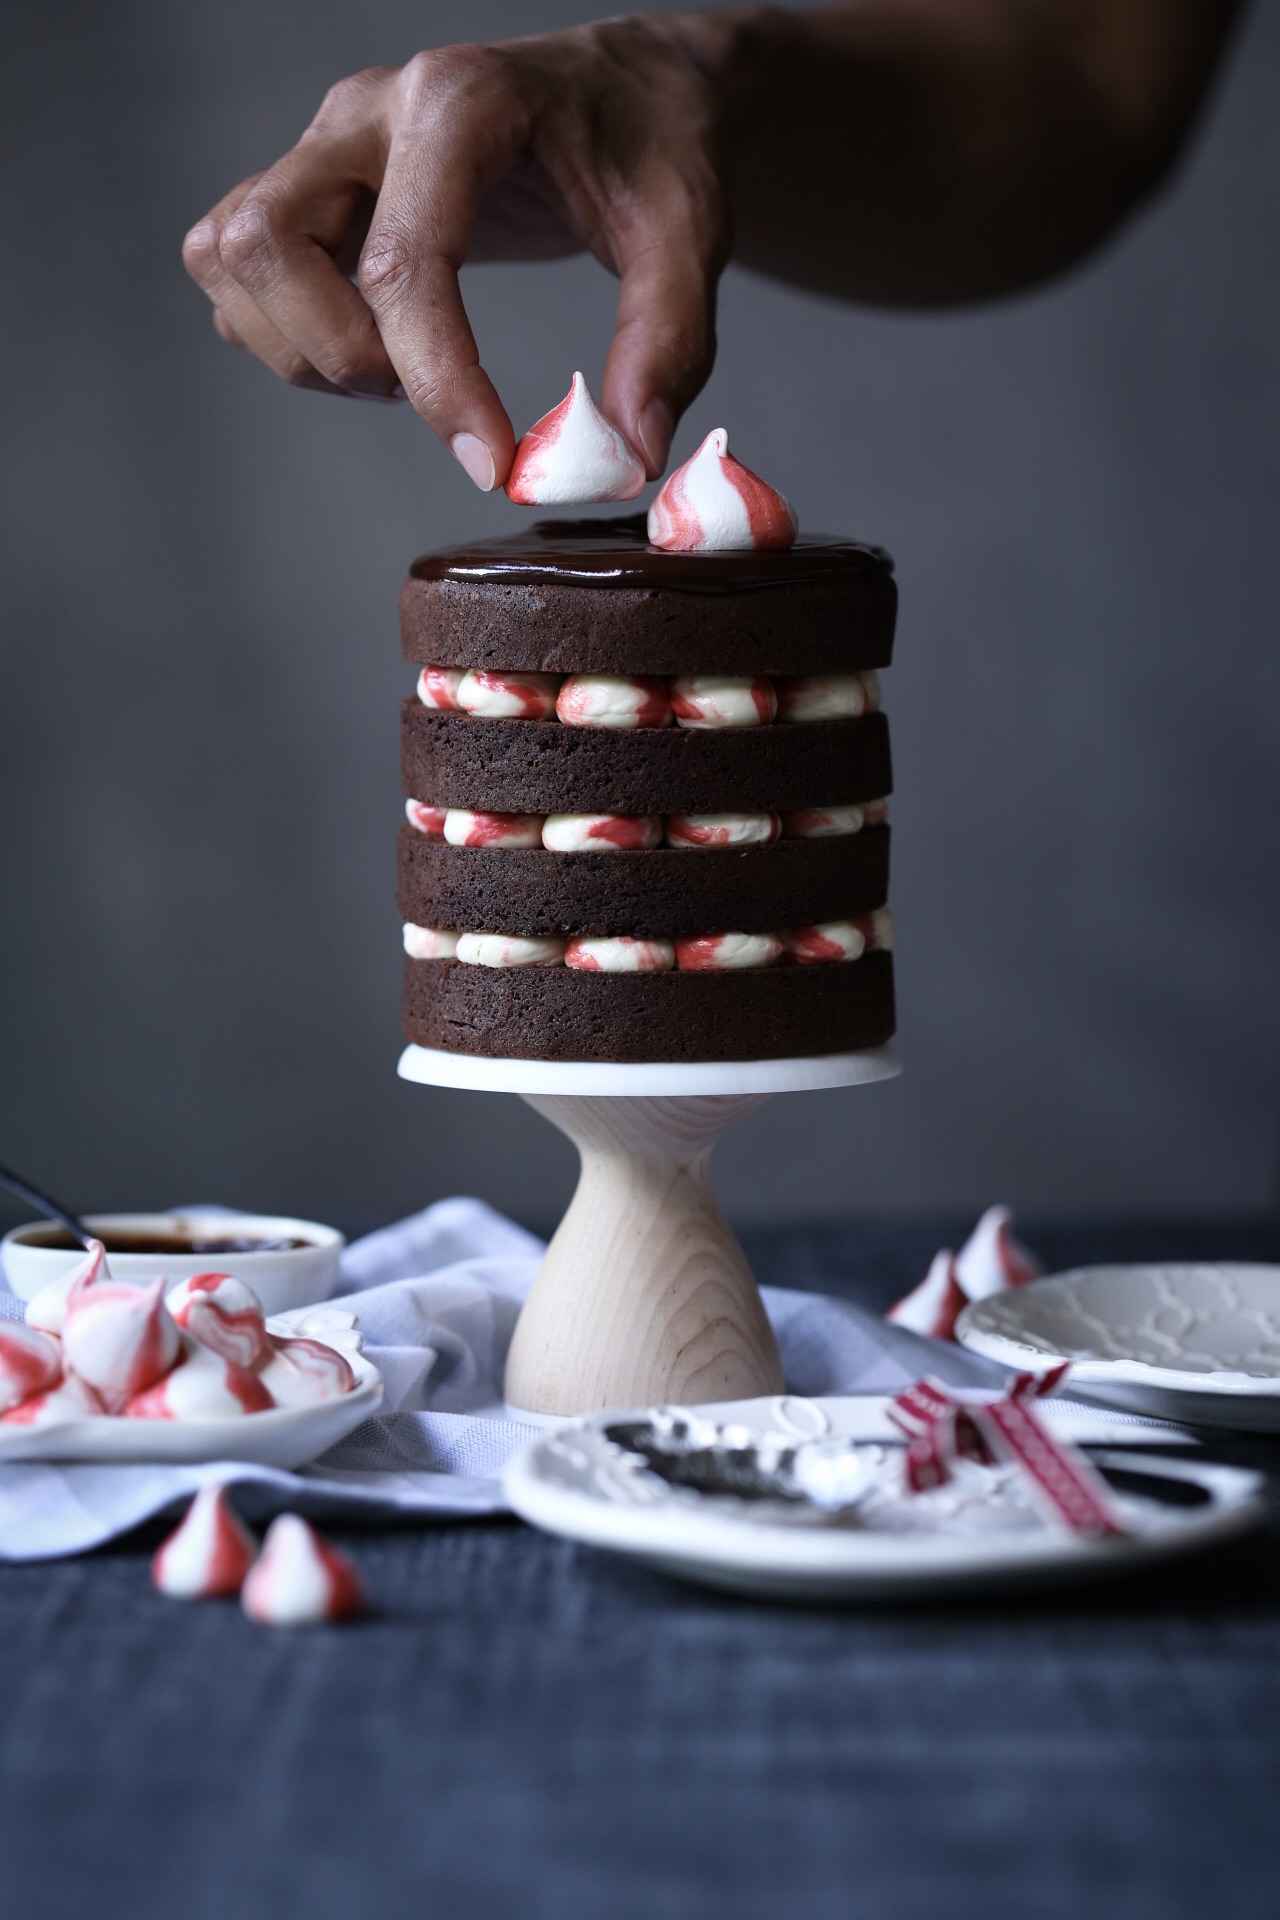
(5) To decorate this cake and enhance its ‘wow’ factor, I would suggest making your own meringue kisses using my recipe for Swirled Meringue Kisses. Note that the recipe makes a lot more meringue kisses than are required for this tiny cake because I find it quite difficult to whisk a smaller quantity. They will stay crisp in dry conditions in an airtight container for up to 2 weeks (store straight from oven when cooled completely to prevent moisture degrading their quality), and can be used to decorate other cakes or desserts.
 Dark Chocolate Peppermint Brownie Cake
Makes a four layer 10cm (4”) cake
Serves 2-4 people
Ingredients
Dark Chocolate Brownie Cake
100g butter
100g good-quality dark chocolate
100g (1/2 cup, firmly packed) muscavado sugar
75g (1/3 cup) caster sugar
2 large eggs, at room temperature
150g (1 cup) plain flour, sifted
6 tbsp dutch-process cocoa, sifted
1 tsp baking powder, sifted
Peppermint Swiss Meringue Buttercream
2 large egg whites
90g caster sugar
125g unsalted butter, softened
2-3 tsp good-quality peppermint essence
Red gel-based food colouring
Dark Chocolate Ganache
50g good-quality dark chocolate
1 tbsp pure cream
Decorations
Swirled meringue kisses
Method
Dark Chocolate Brownie Cake
(1) Preheat oven to (180°C/160°C fan-forced) and line two 10cm (4”) round baking pans with greaseproof paper.
(2) Melt butter and dark chocolate in small saucepan on low heat until smooth, then set aside to cool for 10 minutes.
(3) Place sugars and eggs in free-standing mixer with paddle attachment and beat until pale and smooth.
(4) Pour melted chocolate and butter mixture into beaten sugar and eggs, and beat until combined.
(5) Add 1/3 of the sifted plain flour and gently beat on low speed to combine, then the rest of the flour, cocoa and baking powder, until mixture is smooth. Take care not to overmix.
(6) Divide mixture between prepared cake pans, weighing each pan to ensure equal weight. Bake for approximately 40 minutes or until a cake tester inserted comes out clean.
Peppermint Swiss Meringue Buttercream
(1) Place egg whites and caster sugar in heatproof bowl over small saucepan of simmering water, ensuring the base of the bowl does not touch the water.
(2) Allow the sugar to dissolve, whisking intermittently, heating to 65°C to ensure egg whites are pasteurised.
(3) Allow mixture to cool to room temperature, then whisk in free-standing mixer until white, glossy, soft meringue peaks form.
(4) Very slowly add small 1cm cubes of softened butter, and continue whisking until buttercream is light and fluffy.
(5) Continue whisking buttercream while slowly adding teaspoons of peppermint essence to taste.
(6) Prepare a piping bag with a small round nozzle (I used a nozzle with a 0.5cm or ¼“ round tip) and turn the edge of the piping bag down to allow greater access to the interior.
(7) Place 2 teaspoons of peppermint buttercream in a separate bowl and use gel-based food colouring to tint to a deep shade of red.
(8) Using a toothpick or skewer, streak the red buttercream evenly lengthways on the inside of the piping bag. Repeat this step twice, to achieve 3 evenly spaced red buttercream streaks lengthways inside the piping bag.
(9) Carefully fill the rest of the piping bag with the white peppermint buttercream.
(10) Pipe a few test blobs of buttercream on a separate plate or flat surface to ensure the red swirls are appearing in the buttercream and that you are satisfied with the size and shape of your blobs, as this step is difficult to redo once you have started piping on your cake. Set aside your piping bag of swirled peppermint buttercream for assembly of the cake.
Dark Chocolate Ganache
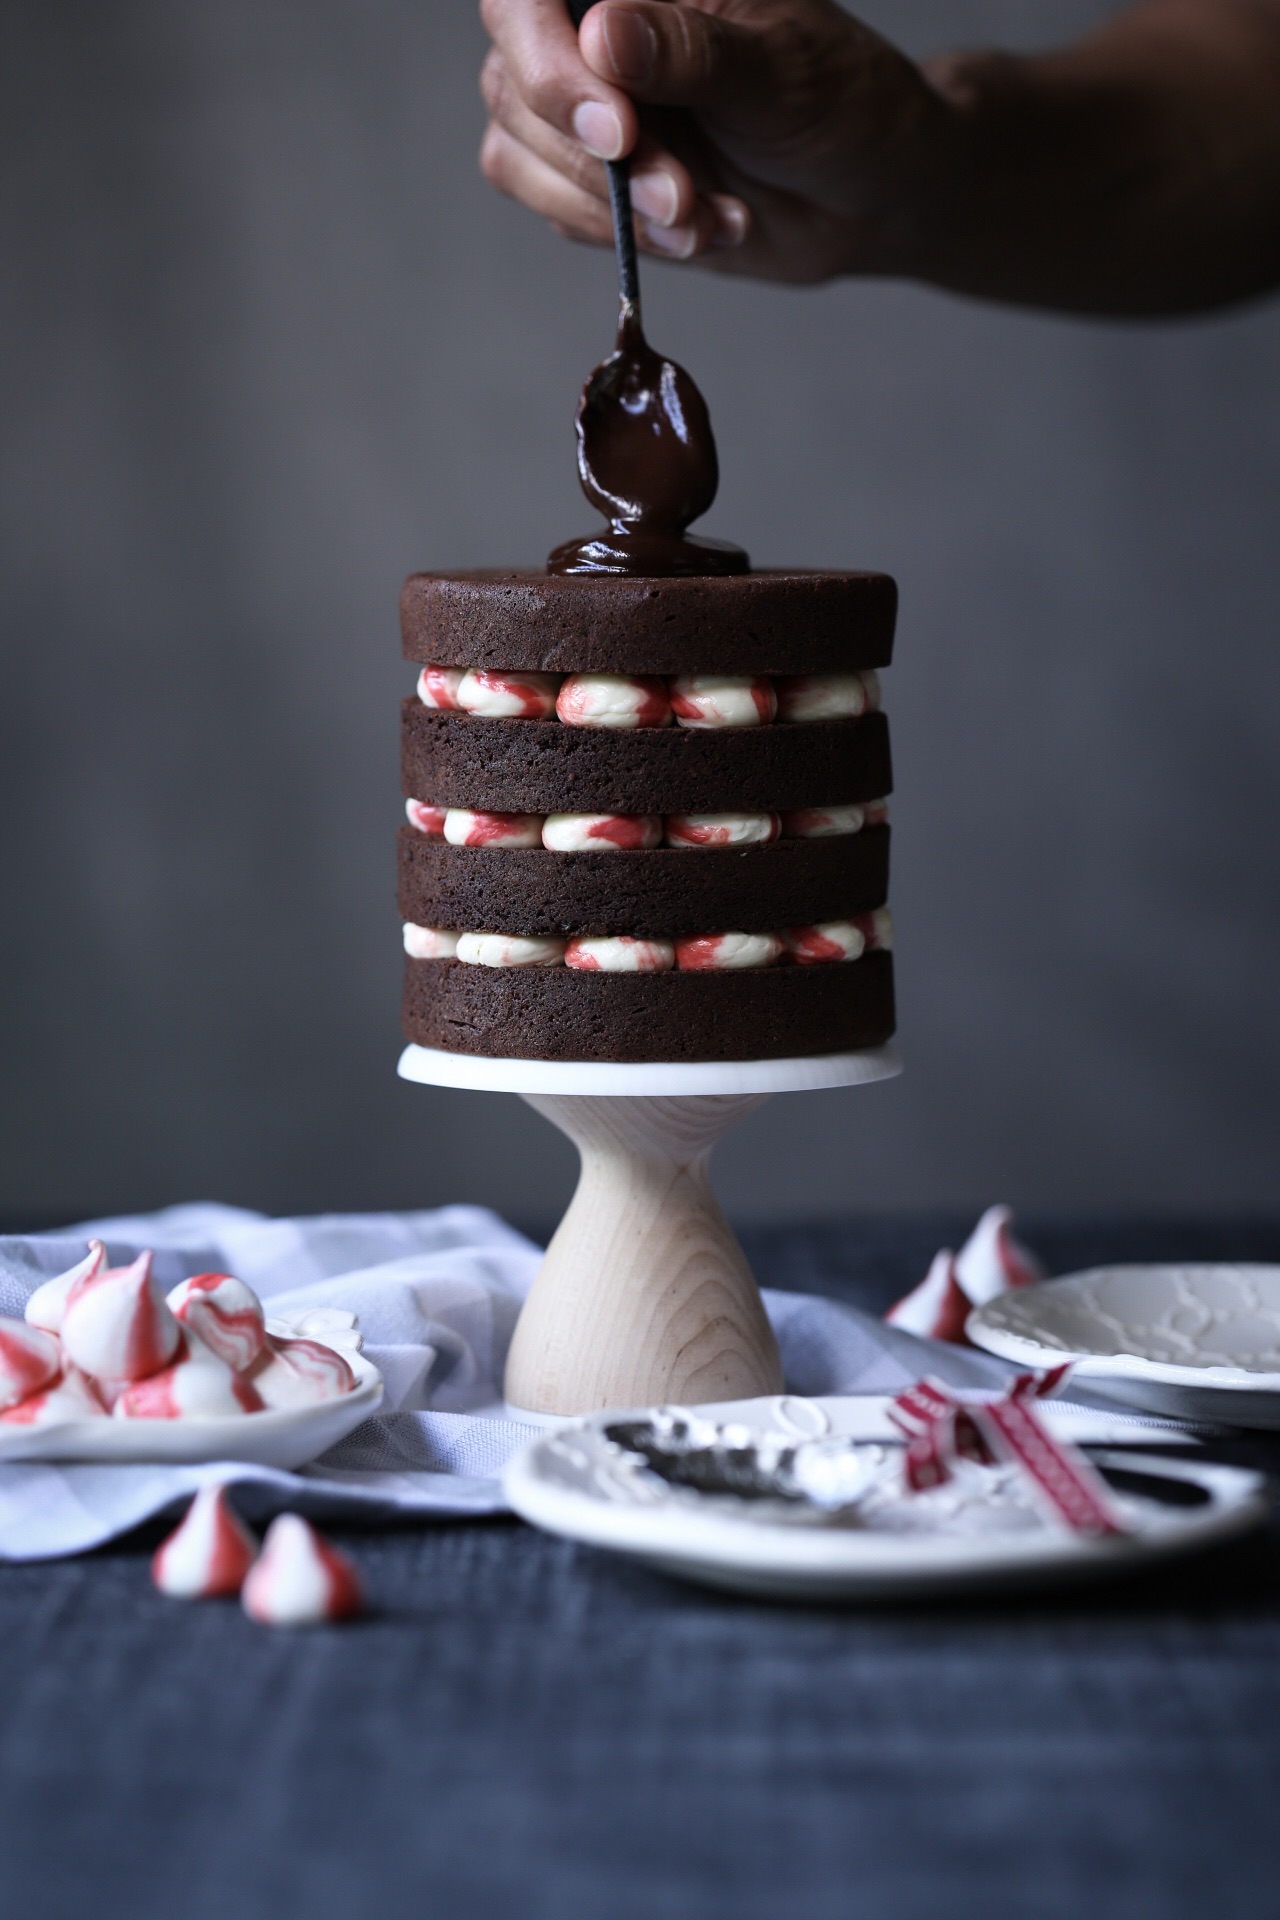
(1) Gently melt dark chocolate and cream together in a small saucepan on low heat. The ganache should be shiny and thick, and able to be easily spread over the top layer of the cake. Set aside for assembly of the cake.
Assembly
(1) Assembling this cake is easiest when the cake is slightly chilled, the buttercream is at room temperature and the ganache is thick and spreadable.
(2) Level each cake by slicing off the crusty tops, then cut them in half lengthways to yield four cake layers in total.
(3) Place the first layer on a round cake plate or turn-table and pipe even blobs of swirled peppermint buttercream on the surface. Repeat frosting between each cake layer, ensuring the base of one of the cakes is used as the top layer of the finished cake, and placed cut-side-down on the top of the cake to avoid crumbs in the ganache.
(4) Spread dark chocolate ganache evenly over the top surface of the cake using a palate knife.
(5) Decorate the cake with meringue kisses.
Enjoy!
 Credits and Sources
Cake recipe adapted from Lomelino’s Cakes by Linda Lomelino
Mini wooden cake stand from American Heirloom
White ceramic embossed plates and tea strainer (styled as serving dish) from Marley and Lockyer
Small white ceramic bowl from Antler and Moss
Napery from Country Road
I’m also now on Bloglovin, follow along!
It looks lovely, but if you actually bake a cake of this size for forty minutes, it’s going to be a charred remnant.
Hi Robert, thanks for your comment. I have made this cake a number of times, and I agree, I’m always surprised it needs that long in the oven! It is mainly due to the height of these cakes that they do require the full 40 minutes in my experience, although I would usually suggest checking the cake 5-10 minutes prior to the suggested baking time, depending on your oven.
Could i use 6′ rounds for a two layer cake with these measurements?
Hi Jenna,
Thanks so much for your query. You can certainly make a 6′ two-layer cake with the same quantity of ingredients, although keep it mind it will have a very different aesthetic, and a taller layer cake will often have a greater ‘wow’ factor. If you prefer to maintain the height of the cake, an alternative would be to double the entire recipe (cake, frosting and ganache) and bake the cake in two 6″ pans and then divide each cake into 2 for a total of 4 layers. Note that you will also need to bake the cakes for longer (approx. 45-50 mins). Hope this helps and happy baking!
Kind regards,
Salma