• Skip to primary navigation
  • Skip to main content
  • Skip to primary sidebar

The Polka Dotter

Baking a bit of beauty into every day

  • Home
  • Recipe Index
  • Portfolio

Swirled Meringue Kisses

December 4, 2016 by Salma 2 Comments

Swirled Meringue Kisses 
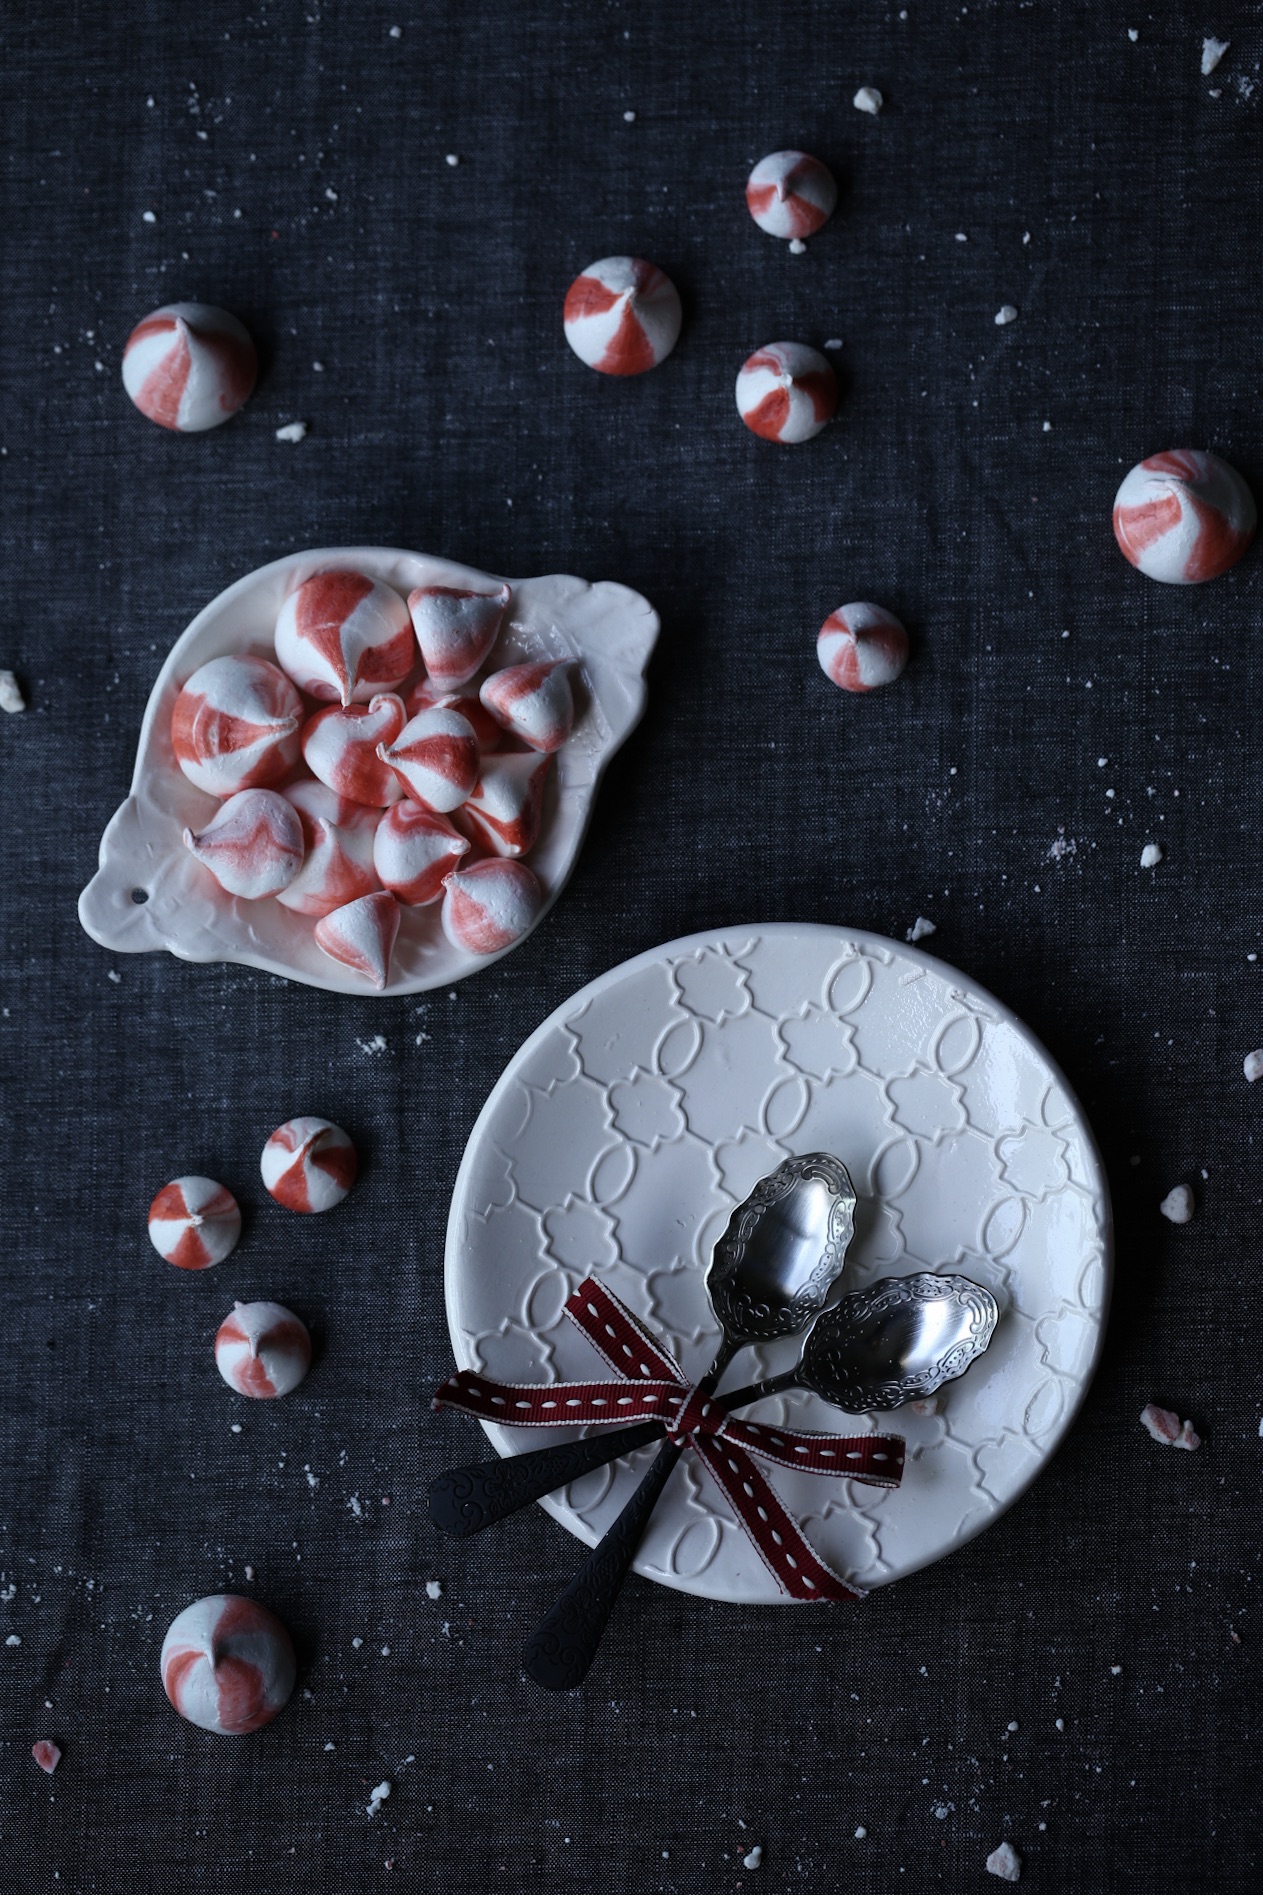
Swirled meringue kisses add a crisp sweet touch to many desserts and creations, and are one of my favourite ways to dress up a layer cake. I used red gel-based food colouring to swirl these meringues, as they provided the final flourish for this delicious Dark Chocolate Peppermint Brownie Cake, but you can of course use whatever colour suits your palate best.

Baking Notes
(1) To ensure the greatest volume when whisking your egg whites, ensure all cooking utensils are squeaky clean from grease, and that you use the freshest eggs possible, and at room temperature. If you need to bring the eggs quickly to room temperature from the fridge, placing them uncracked in a small clean bowl of warm water will hasten the process.

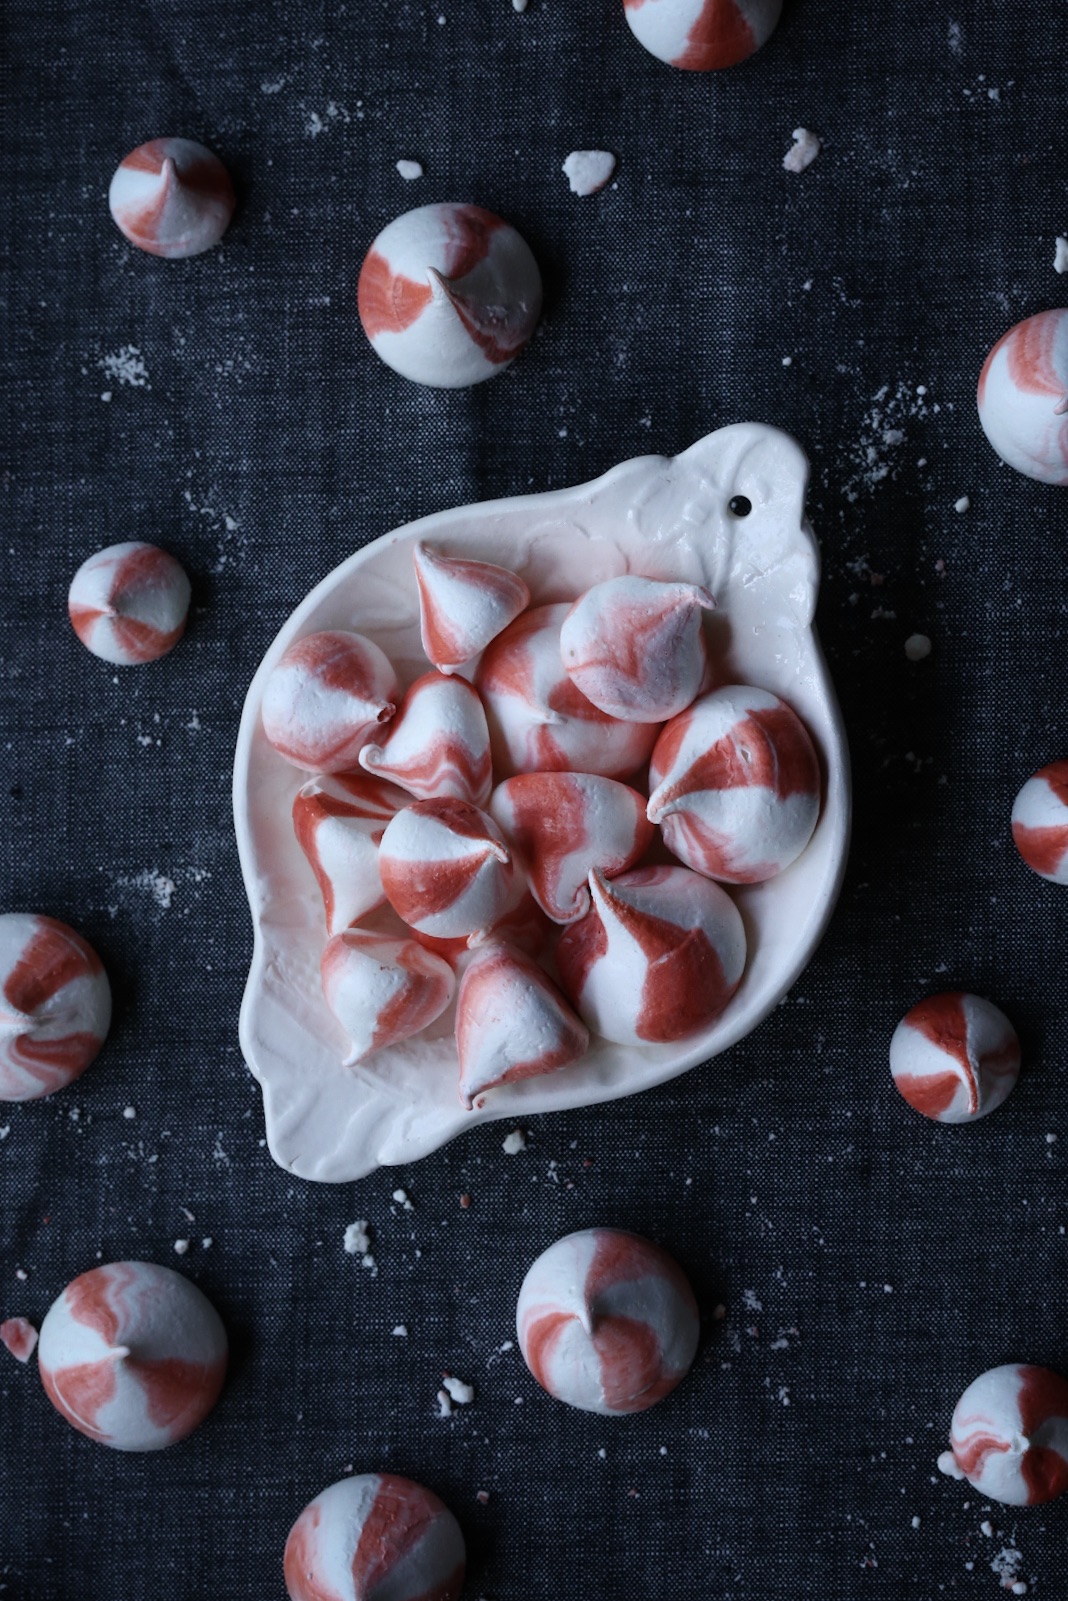
(2) To achieve the swirled effect, I tinted a small portion of meringue red, and streaked it inside the piping bag. Ensure this step is carefully carried out, as it will contribute significantly towards the aesthetics of your meringue kisses.

(3) This recipe makes a large batch of meringue kisses, which is often far too many for one cake, but the alternative of making a smaller quantity is difficult as it would require whisking a very small amount of meringue. I like to use the opportunity to make a large batch and then store them in an airtight container for up to 2 weeks (store straight from oven when cooled completely to prevent moisture degrading their quality), so they can be used to decorate other cakes or desserts.

Swirled Meringue KissesSwirled Meringue Kisses
Makes 50-60 small (approx. 2.5cm) swirled meringues kisses

Ingredients
2 large egg whites, at room temperature
110g caster sugar, sifted
Gel-based food colouring

Method
(1) Pre-heat oven to 140°C (120°C fan-forced) and line a baking tray with baking paper.
(2) Place egg whites in free standing mixer with whisk attachment and whisk on medium speed until frothy.
(3) Slowly add caster sugar, tablespoon by tablespoon, while continuing to whisk.
(4) Turn mixer up to high speed and continue whisking until mixture transforms into glossy thick meringue and stiff peaks form. If you rub a little meringue between your fingers it should feel completely smooth, with no grittiness of undissolved sugar.
(5) Prepare a piping bag with a small round nozzle (I used a nozzle with a 0.5cm or ¼“ round tip) and turn the edge of the piping bag down to allow greater access to the interior.
(6) Place 2 teaspoons of meringue in a separate bowl and use gel-based food colouring to tint to a deep shade of desired colour.
(7) Using a toothpick or skewer, streak the coloured meringue evenly lengthways on the inside of the piping bag. Repeat this step twice, to achieve 3 evenly spaced coloured streaks lengthways inside the piping bag.
(8) Carefully fill the rest of the piping bag with the white meringue.
(9) Pipe small (approx. 1.5-2cm) blobs of meringue onto your tray approx. 2-3cm apart to allow for expansion. You should notice little coloured streaks or swirls appearing in your meringue kisses as you pipe. Often the first 2-5 meringue kisses may not have enough colour but this is usually resolved after piping a few meringues.
(10) Place tray in oven and turn the oven down to 120°C (100°C fan-forced). Bake for approximately 60 minutes, then turn oven off without opening the oven door and leave tray in for at least another 20 minutes to allow the meringue kisses to cool down slowly.
(11) Store in an airtight container for up to 2 weeks or devour immediately.

Enjoy!

Credits and Sources
White ceramic embossed dessert plate and tea strainer (styled as serving dish) from Marley and Lockyer

Filed Under: Meringues & Pavlovas Tagged With: Meringue

Previous Post: « Spice Infused Rhubarb Cheesecakes
Next Post: Dark Chocolate Peppermint Brownie Cake »

Reader Interactions

Comments

  1. LDwyer

    December 10, 2016 at 12:18 am

    Do you have any pictures of how you make the swirls in the merengues? I can’t seem to understand how you make that happen.
    They are so adorable!

    Reply
    • Salma

      December 12, 2016 at 9:09 pm

      Hi Lisa, thanks for your comment and query. I actually didn’t end up taking any shots during prep, I’m sorry! This post from Bakerella on Meringue Kisses has an image that may help explain the technique though: http://www.bakerella.com/meringue-kisses/ 🙂

      Reply

Leave a Reply Cancel reply

Your email address will not be published. Required fields are marked *

This site uses Akismet to reduce spam. Learn how your comment data is processed.

Primary Sidebar

Welcome!

Salma Sabdia | Food Photography

Hi, I’m Salma, and I love creating beautiful images and sweet treats. If you’re looking for a little baking inspiration, you’ve come to the right place.

SaveSave

  • Bloglovin
  • Facebook
  • Instagram
  • Pinterest

Instagram

This deliciously decadent (dare I say moist!) Choc This deliciously decadent (dare I say moist!) Chocolate Orange & Salted Caramel Cake is the second instalment in our Baker’s Choice Game.

A few weeks ago you voted for the flavours you wanted to see in this month’s bake and here they are. Orange and salted caramel aren’t a pairing I’d usually use, so I couldn’t help but include chocolate to negotiate between the two, and I must say I’m rather glad we stumbled upon this glorious combination together 🤎🧡 

Find the recipe linked in my profile, and if you’d like to hear from me in your mailbox rather than relying on the doom scroll, I warmly encourage you to join my newsletter (also linked in my profile!) 😊
A friend recently reminded me of these buns, and I A friend recently reminded me of these buns, and I’ve had a craving ever since. Because how can you go wrong with sour cherry and dark chocolate?

If you, too, now have the same craving, the recipe is linked in my profile 🤎
Same cake. Different sizes. Which Earl Grey Laven Same cake. Different sizes.

Which Earl Grey Lavender Cake would you pick - 6” layers for 12 or the teeny tiny 4” version for 2?

Recipe linked in profile 🤎
This is not a celebration cake. It’s a cake of p This is not a celebration cake. It’s a cake of pure comfort.

After a recent baking lull, I put it to you, our Instagram baking community to vote on the flavours you wanted to see in my next recipe.

The results? Rhubarb, almond and cardamom were clear winners, and after sourcing the loveliest bunch of rhubarb at the farmers market, this recipe was born.

May this simple buttery cake warm your kitchen and your heart 🩷

Recipe linked in profile
Chai poached pears - the easiest and most comforti Chai poached pears - the easiest and most comforting dessert you’ll make this autumn. Salted caramel optional, but totally worth it 🤎 

Recipe linked in profile
My fine art photography print series has arrived! My fine art photography print series has arrived!

The perfect gift for the baker in your life, or treat yourself with a stylish addition to your kitchen, bedroom or home office.

This limited edition debut collection symbolises the joy of human connection through food, honouring the notion of blending nature with cake in a vibrant harmony.

Only 25 prints available worldwide | Shop the link in my profile if you’d love to make one yours

#fineartphotographyprints #photographyprints #giftsforthehome #giftsforbakers
🌟 A LOVELY GIVEAWAY 🌟 I’m launching a co 🌟 A LOVELY GIVEAWAY 🌟 

I’m launching a collection of fine art photography prints next week. And to thank you for your support, I’d love to give one away.

These prints are an elegant celebration of the joy of human connection through food, honouring the beauty and stillness of blending nature with cake in a vibrant harmony.

To enter:
1. Like this post 💫
2. Comment below with your favourite image: 1, 2, or 3.
3. Sign up to my mailing list via the link in my profile.

Ensure you’ve completed all 3 steps for a valid entry.

The winner will receive one unframed A3 fine art print, professionally printed in Australia on luxurious gallery-quality paper using archival inks.

Entries close: 11:59pm AEST, April 15
Winner will be notified via email on April 16

Thank you for being part of this launch – I’m so thrilled to share this new creative chapter with you.

Find the full Terms & Conditions in the comments below.
First look at something special I’ve been workin First look at something special I’ve been working on.. a fine art photography print collection!

I know so many of you have loved baking my recipes over the years, and would love the opportunity to add a touch of cake sophistication to your kitchen or home.

So I’m excited to launch a series of art prints next week showcasing your favourite cake images.

Priority access will be given to mailing list subscribers, so if you would love to secure your print before they launch to the general public, please take a moment to join my mailing list.

Find the link in my profile 😊
Sharing one last fig recipe before this glorious s Sharing one last fig recipe before this glorious season comes to a close.

I originally created this recipe for my former baking blog six years ago, albeit in miniature form. This season I’ve reimagined it in a classic rectangular design, but rest assured, the same enticing spiced pomegranate syrup is still there in all its glory.

If you’ve been on the hunt for a celebratory dessert that heroes juicy fresh figs, I hope your search ends here!

Recipe linked in profile
Follow @thepolkadotter on Instagram

Latest Blog Posts

Blood Orange + Earl Grey Bundt Cake | The Polka Dotter
Sour Cherry & Chocolate Heart Crust Buns
Roasted Plum Swirl Ice Cream | The Polka Dotter
Blackberry & Chocolate Cupcakes | The Polka Dotter
Honey Lavender Ice Cream | The Polka Dotter
Rosewater Panna Cotta + Fresh Figs | The Polka Dotter
Chocolate Macadamia Black Sesame Cake | The Polka Dotter
strawberry-macadamia-mango-ice-cream-terrine
gingerbread-cookies-with-lemon-icing

Copyright © 2025 · Foodie Pro & The Genesis Framework